
MUSE - ColorPOP!
Paste Full Pattern
Layout & Wall
Hanging Hook
Drops — edit individually
Assembly Diagram
top to bottom, left to right
420px
0 Links
Color Tally
Color # reference (click to expand)
Wall Rendering
Installation Instructions
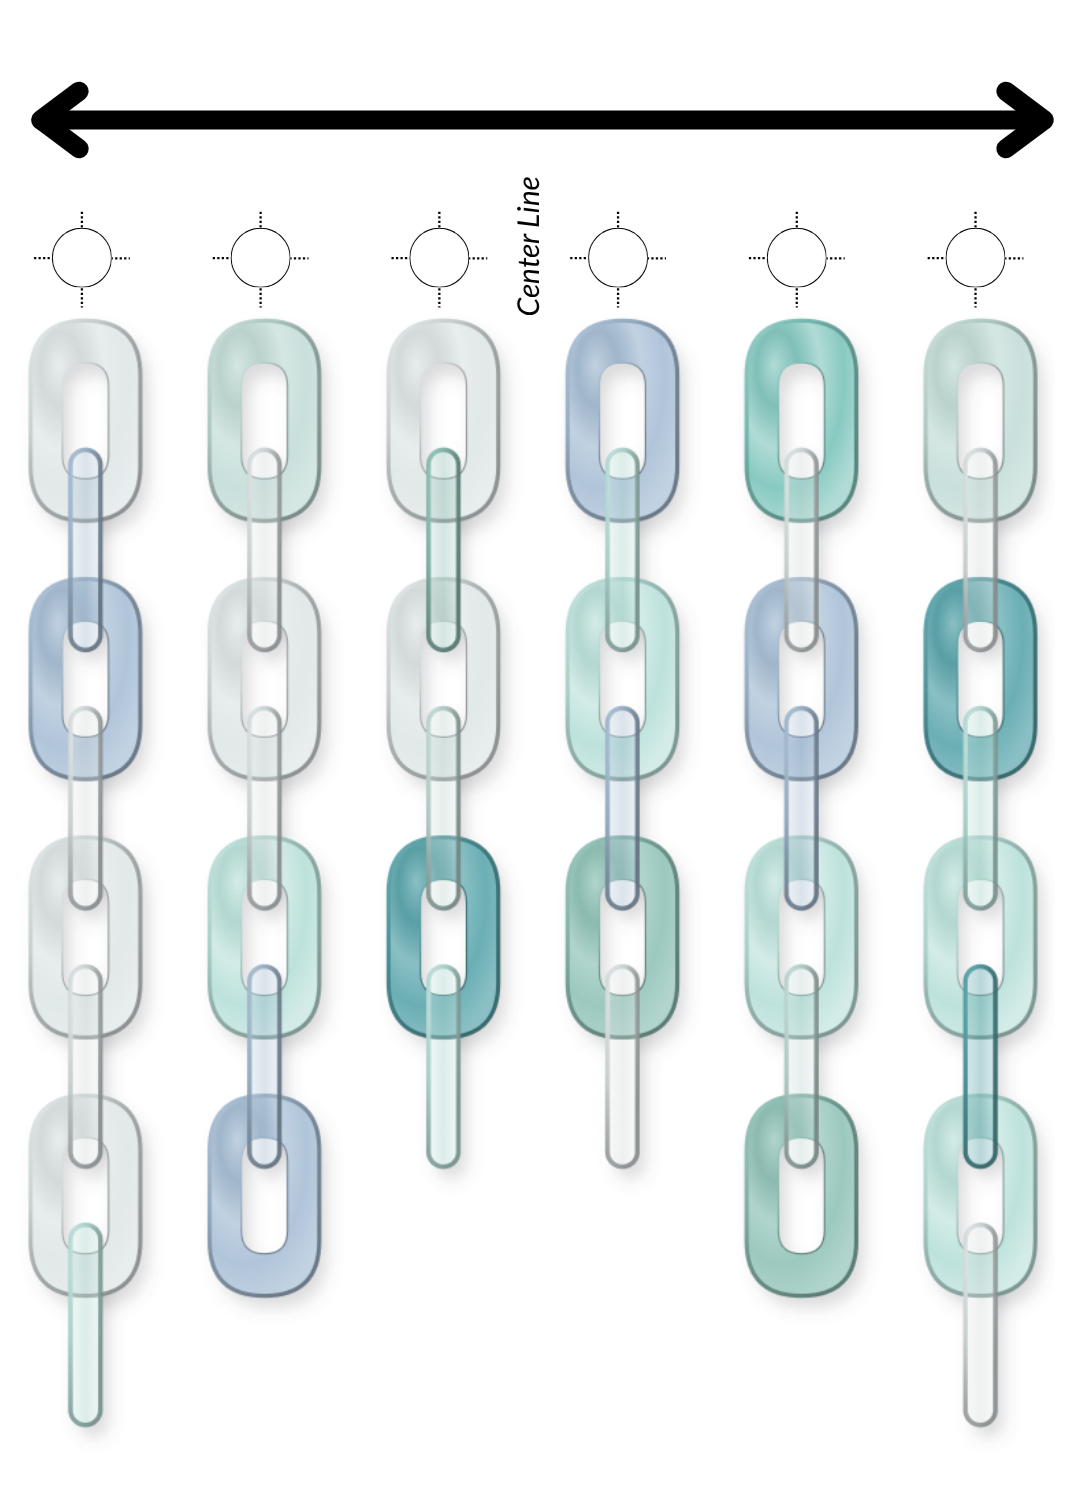
(1) MEASURE
Always re-measure your wall before install.
Find the center, or focal, point of where you want the art hung.
Mark this with a post-it or painters tape.
Avoid marking walls as your center line may NOT be where a hook lands.
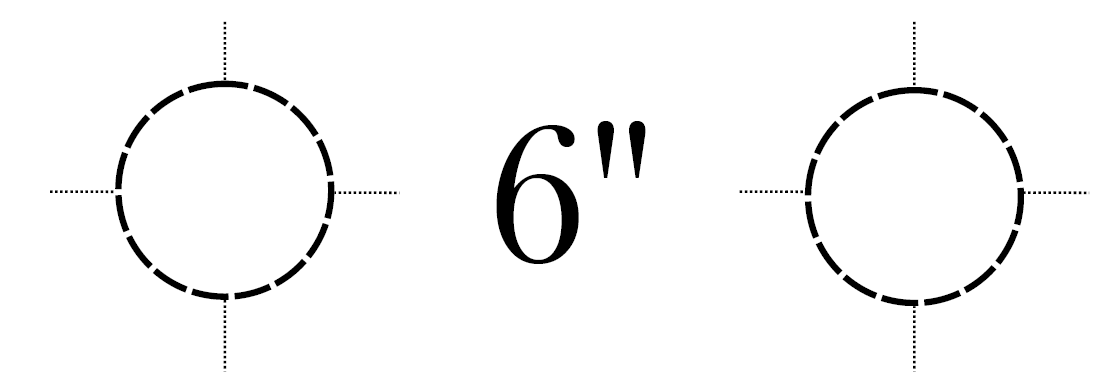
(2) HOOKS
Tape the provided spacing template(s) to the wall. Ensure all circles are the same distance center-to-center; standard spacing is 6”.
Mark screw holes for the wall plate on the paper. Drill pilot or wall anchor holes through the paper.
Remove paper to insert wall anchors and attach wall plate.
Attach the hook by tightening set screw.
Note: For heavier installations use weight rated wall anchors, molly or toggle bolts.
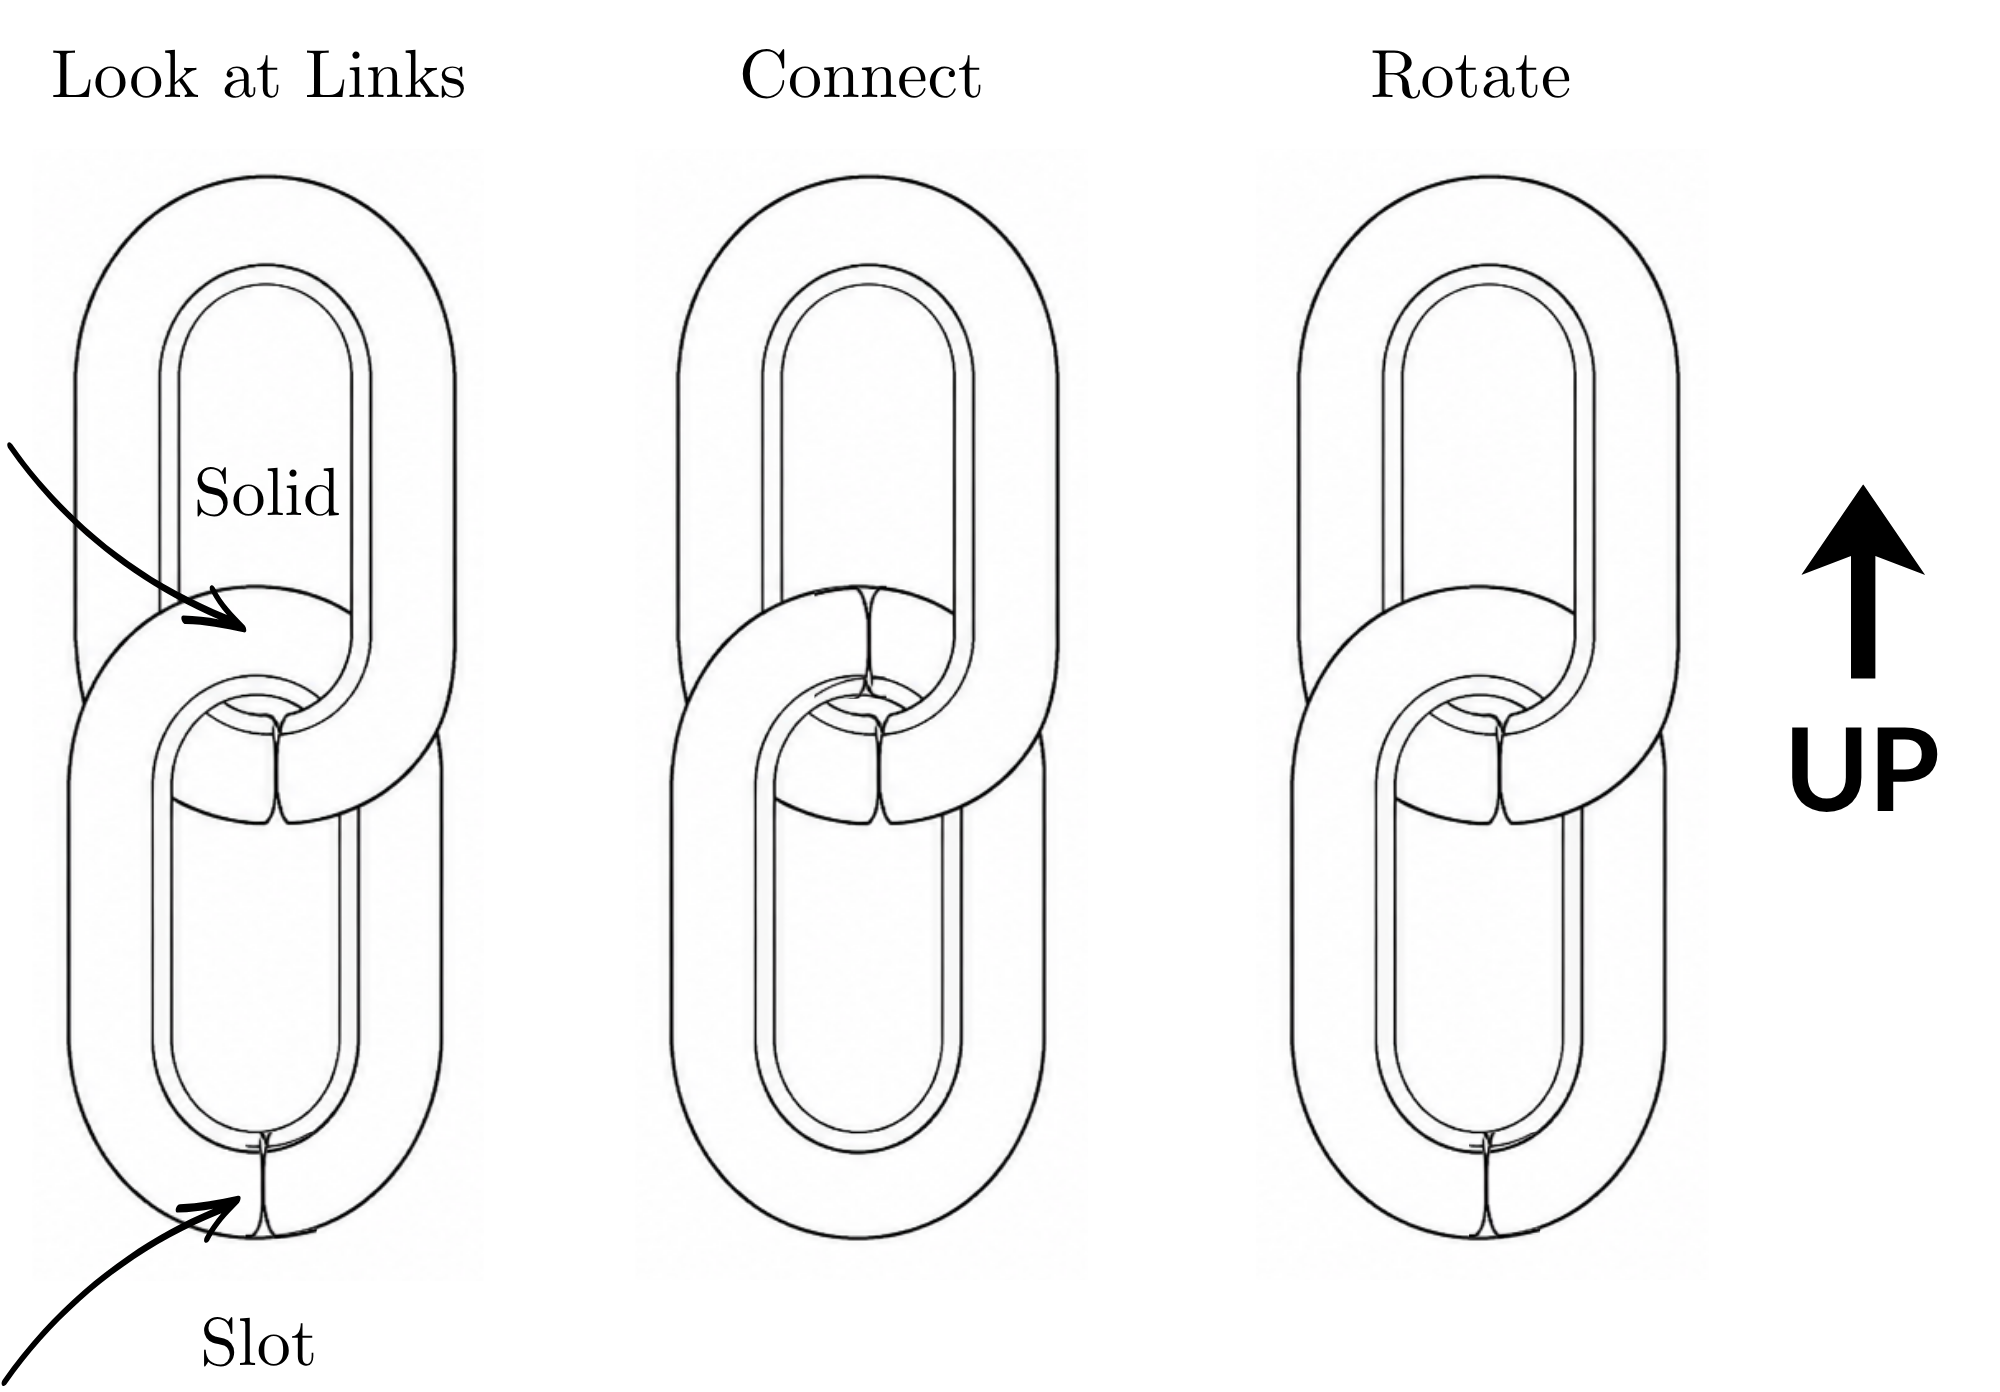
(3) ASSEMBLE
Starting Left-to-Right assemble each drop by removing the first link from your box, and attaching the second link. Links are packaged with the top links at opening.
To connect links together slip their slotted ends together and flip so that the solid portion of the link is now resting on the slotted end. Continue until each drop is complete.
TIPS + TRICKS
Help! The chain links are ‘closed’ and won’t slip onto each other.
Not to worry! Sometimes chain links shift in transit. Gently pull on the link arms near the slotted end . At the same time positioning against another chain link slot. Slide together. Chain links only need a tiny opening to slide together.